学习了一下scrapy爬虫,记录一下过程。
一、新建工程
1. 创建项目
powershell下:
1 | |
2. 创建爬虫程序
1 | |
注意:==网站地址前面不要有http://之类的==
3. 启动spider
1 | |
二、文件说明
- scrapy.cfg:项目的配置信息,主要为Scrapy命令行工具提供一个基础的配置信息。(真正爬虫相关的配置信息在settings.py文件中)
- items.py:设置数据存储模板,用于结构化数据,如:Django的Model
- pipelines:数据处理行为,如:一般结构化的数据持久化
- settings.py:配置文件,如:递归的层数、并发数,延迟下载等
- spiders:爬虫目录,如:创建文件,编写爬虫规则
以上命名都是固定的
1. items.py:
1 | |
2. example.py
example.py是scrapy genspider命令中spider名称
1 | |
4. main.py
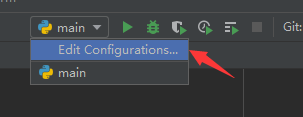
在pycharm里,可以将指令写入main.py中,简化操作。
1 | |
如果没有出现运行标志,表示需要配置:
配置
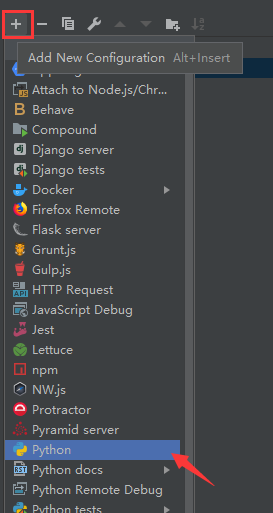
添加新配置
配置信息
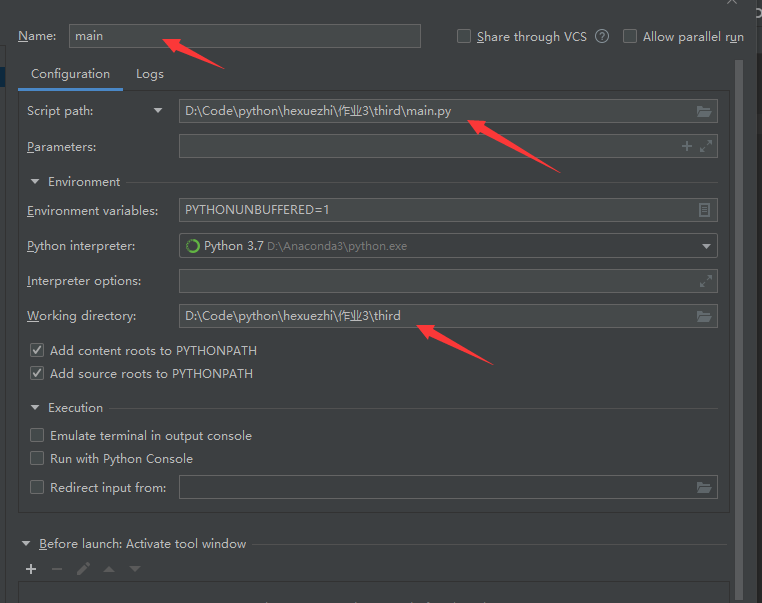
==工作目录需要选择py文件的父文件夹==
三、延迟获取
对于浏览器看到的和实际打印的response.body不同的解决方法有两种,两种都可以进行尝试。
1. DOWNLOAD_DELAY
在setting.py中找到DOWNLOAD_DELAY取消注释设置值。
1 | |
2. middleware
2.1 安装selenium
1 | |
2.2 安装chromedriver
注意:==chromedriver的版本一定要与Chrome的版本一致,不然就不起作用。==
查看chrome版本方法:在浏览器地址栏输入chrome://version/
两个下载地址:
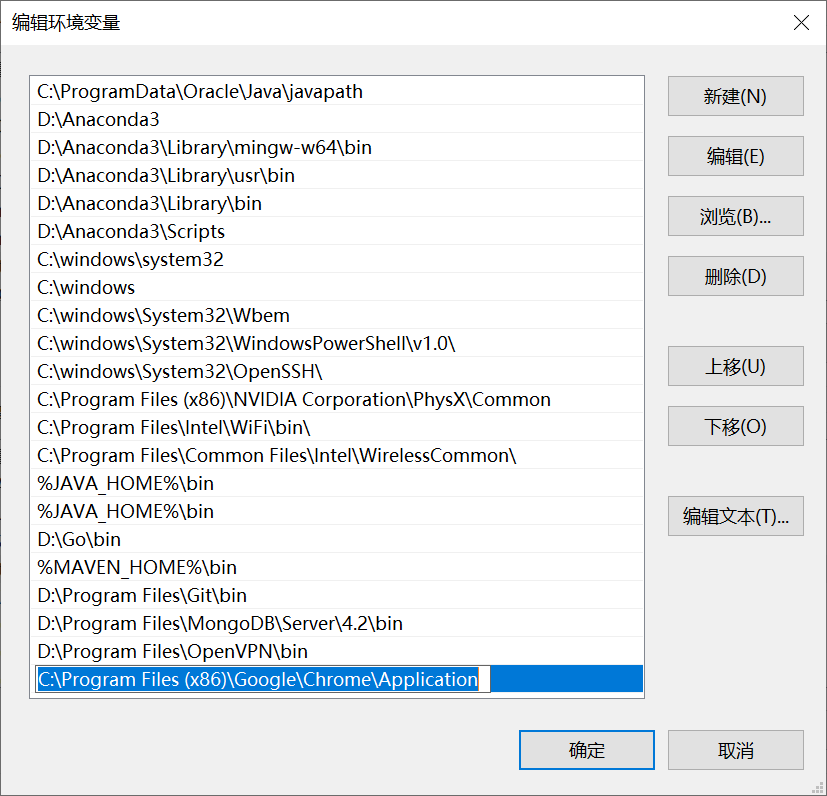
解压压缩包,找到chromedriver.exe复制到chrome的安装目录(其实也可以随便放一个文件夹)。复制chromedriver.exe文件的路径并加入到电脑的环境变量中去(不添加也行,得记住路径)。具体的:
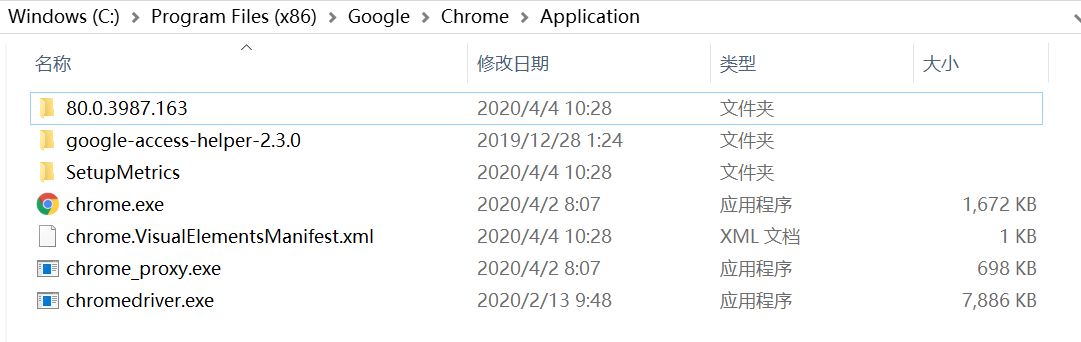
进入环境变量编辑界面,添加到用户变量即可,双击PATH,将你的文件位置(C:\Program Files (x86)\Google\Chrome\Application)添加到后面。
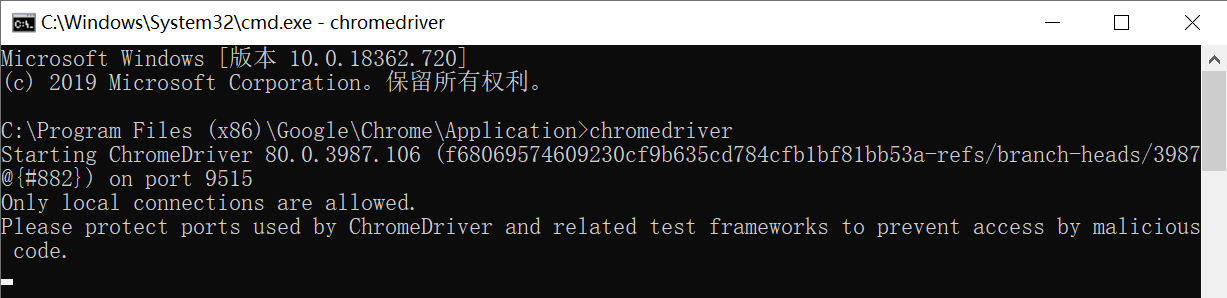
打开cmd,输入chromedriver监测是否安装成功。
2.3 配置
将settings.py中的
DOWNLOADER_MIDDLEWARES解除注释。
在middlewares.py导入将需要的包并且设置变量。
1
2
3
4
5
6
7
8
9import time
from scrapy.http import HtmlResponse
from selenium import webdriver
from selenium.common.exceptions import TimeoutException
from selenium.webdriver.chrome.options import Options
chrome_options = Options()
chrome_options.add_argument('--headless')
driver = webdriver.Chrome("C:\Program Files (x86)\Google\Chrome\Application\chromedriver.exe",chrome_options=chrome_options)在middlewares.py找到相应的middleware的类中的
process_request函数,函数中添加以下代码,代码块如图。其中起关键作用的是time.sleep(10),意思是延迟多长时间。延迟后再返回current.url和body。本例中类名为MyCrowlersDownloaderMiddleware,具体类名会根据项目名变化。1
2
3
4
5
6
7try:
driver.get(request.url)
except TimeoutException:
print('超时,丢弃本页', request.url)
driver.execute_script('window.stop()')
time.sleep(10)
return HtmlResponse(url=driver.current_url, body=driver.page_source, encoding="utf-8",request=request)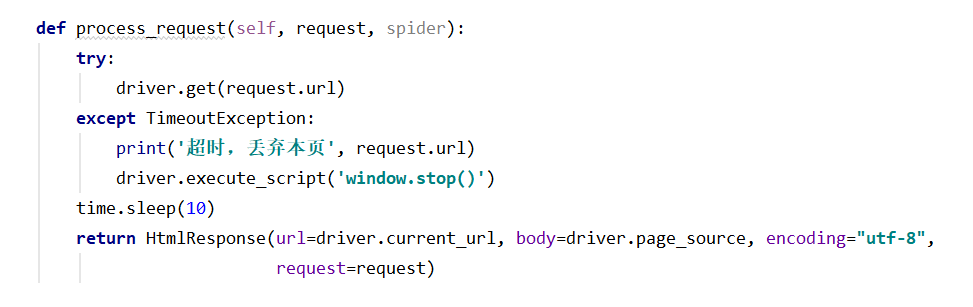
2.4 滚动加载配置(这部分好像有问题)
在middlewares.py新导入一个包。
1
from selenium.common.exceptions import TimeoutException在
process_request函数中添加以下代码,代码块如图。1
2
3
4
5
6
7
8try:
spider.browser.get(request.url)
spider.browser.execute_script('window.scrollTo(0, document.body.scrollHeight)')
except TimeoutException as e:
print('超时')
spider.browser.execute_script('window.stop()')
time.sleep(2)
return HtmlResponse(url=spider.browser.current_url, body=spider.browser.page_source, encoding="utf-8",request=request)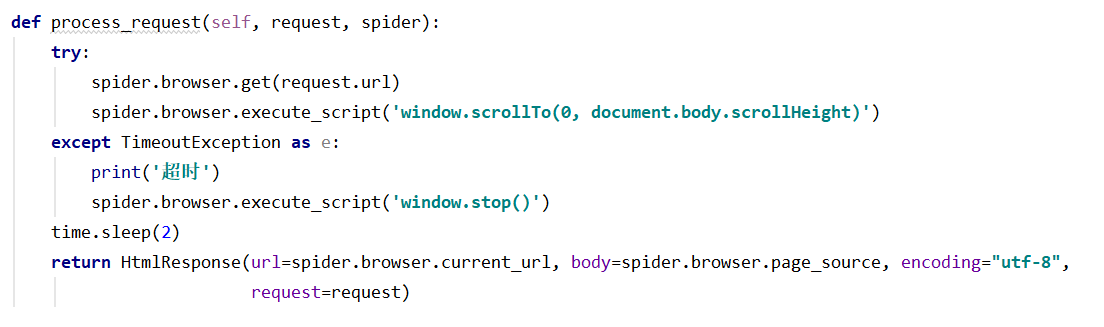
四、保存数据
共使用三种保存方法,一种是保存为json文件,一种是直接保存到es中。
1. 保存至json
在piplines.py中添加如下代码
1
2
3
4
5
6
7
8
9
10
11
12
13
14
15
16
17
18
19
20
21
22
23class ScrapyCodePipeline(object):
def process_item(self, item, spider):
# print('pipeline got item:',item)
return item
from scrapy.exporters import JsonItemExporter
class JsonExporterPipleline(object):
# 调用scrapy提供的json export导出json文件
def __init__(self):
self.file = open('export.json', 'wb')
self.exporter = JsonItemExporter(self.file, encoding="utf-8", ensure_ascii=False)
self.exporter.start_exporting()
def close_spider(self, spider):
self.exporter.finish_exporting()
self.file.close()
def process_item(self, item, spider):
self.exporter.export_item(item)
return item在settings.py中找到
ITEM_PIPELINES,改成如下。1
2
3
4
5
6ITEM_PIPELINES = {# item处理方式
# 'scrapy_code.pipelines.ScrapyCodePipeline': 300,
'scrapy_code.pipelines.JsonExporterPipleline': 300,
# 'scrapy_code.pipelines.MysqlTwistedPipline': 300,
# 'scrapy_code.pipelines.ElasticsearchPipeline': 1
}
2. 保存至es中
在piplines.py的同级文件夹下建立Python Package,取名为models,在models下建立es_types.py。目录结构如下:
- models:
- _init_.py
- es_types.py
- piplines.py
- models:
在es_types.py中写入如下代码:
1
2
3
4
5
6
7
8
9
10
11
12
13
14
15
16
17
18
19
20
21
22
23
24
25
26
27
28
29
30
31
32
33
34
35
36
37
38
39
40
41
42
43
44
45
46
47
48
49
50
51
52
53
54
55
56
57
58
59
60
61
62
63
64
65
66
67
68
69
70
71
72
73
74
75
76
77
78
79
80
81
82
83
84
85
86
87
88
89
90
91
92
93
94
95
96
97
98
99
100
101# -*- coding: utf-8 -*-
# elasticsearch_dsl:https://elasticsearch-dsl.readthedocs.io/en/latest/
from elasticsearch_dsl import DocType, Date, Completion, Keyword, Text, Integer
from elasticsearch_dsl.analysis import CustomAnalyzer
#需要在es中安装ik分词器
ik_analyzer = CustomAnalyzer("ik_max_word", filter=["lowercase"])
from elasticsearch_dsl.connections import connections
es=connections.create_connection(host="127.0.0.1")
class jobType(DocType):
# 设置index名称和document名称
class Index:
name = "51job"
doc_type = "_doc"
# settings = {
# "number_of_shards": 2,
# }
# TODO:fileds定义
url = Keyword() # 不分词,默认保留256个字符
job_name = Text(
analyzer="ik_max_word") # “中华人民共和国国歌”拆分为“中华人民共和国,中华人民,中华,华人,人民共和国,人民,人,民,共和国,共和,和,国国,国歌”,会穷尽各种可能的组合;
salary = Text(analyzer="ik_smart") # 将“中华人民共和国国歌”拆分为“中华人民共和国,国歌”将“中华人民共和国国歌”拆分为“中华人民共和国,国歌”
company = Text(analyzer="ik_max_word")
job_position = Text(analyzer="ik_max_word")
experience = Text(analyzer="ik_max_word")
education = Text(analyzer="ik_max_word")
number_of_people = Integer()
published_time = Date()
position_detail = Text(analyzer="ik_smart")
position_type = Text(analyzer="ik_max_word")
location = Text(analyzer="ik_max_word")
company_detail = Text(analyzer="ik_max_word")
suggest = Completion(analyzer=ik_analyzer) # 搜索建议
def __init__(self,item):
super(jobType, self).__init__()#调一下父类的init,避免init重写导致一些init操作没执行
self.assignment(item)
# TODO:将item转换为es的数据
def assignment(self, item):
# TODO:给没爬到的字段赋默认值:空串
keys = ['url', 'job_name', 'salary', 'company', 'job_position', 'experience', 'education', 'number_of_people',
'published_time', 'position_detail', 'position_type', 'location', 'company_detail']
for key in keys:
try:
item[key]
except:
item[key] = ''
# TODO:将字段值转换为es的数据
# 虽然只是将原来的item值赋给了成员变量,但这个过程中会执行数据格式转换操作,比如url本来在item是python的字符串类型,转换后变为es的keyword类型
self.url = item['url']
self.job_name = item['job_name']
self.salary = item['salary']
self.company = item['company']
self.job_position = item['job_position']
self.experience = item['experience']
self.education = item['education']
self.number_of_people = item['number_of_people']
self.published_time = item['published_time']
self.position_detail = item['position_detail']
self.position_type = item['position_type']
self.location = item['location']
self.company_detail = item['company_detail']
# # 或者简化代码为
# for key in keys:
# vars(self)[key]=item[key]
# TODO:生成搜索建议词
self.suggest = self.gen_suggests(((self.job_name, 10), (self.company, 3), (self.position_type, 7)))
def gen_suggests(self, info_tuple):
# 根据字符串生成搜索建议数组
used_words = set() # set为去重功能
suggests = []
for text, weight in info_tuple:
if text:
# 字符串不为空时,调用elasticsearch的analyze接口分析字符串(分词、大小写转换)
words = es.indices.analyze(body={'text': text, 'analyzer': "ik_max_word"})
# anylyzed_words = set([r["token"] for r in words["tokens"] if len(r["token"]) > 1])
analyzed_words = []
for r in words["tokens"]:
if len(r["tokens"]) > 1:
analyzed_words.append(r["tokens"])
anylyzed_words = set(analyzed_words)
new_words = anylyzed_words - used_words
else:
new_words = set()
if new_words:
suggests.append({'input': list(new_words), 'weight': weight})
return suggests在piplines.py中添加如下代码
1
2
3
4
5
6
7
8
9
10
11
12
13
14from .models.es_types import jobType
class ElasticsearchPipeline(object):
def process_item(self, item, spider):
job = jobType(item)# 将item转换为es所需格式
# 将数据传入es
# jobType继承自DocType,所以DocType有的函数,它都有。
# save就是DocType定义的将类中的各成员变量打包成数据插入操作,进行数据插入的函数
job.save()
#仍返回item,使得运行窗口能看到爬到的数据
return item在settings.py中找到
ITEM_PIPELINES,改成如下。1
2
3
4
5
6ITEM_PIPELINES = {# item处理方式
# 'scrapy_code.pipelines.ScrapyCodePipeline': 300,
# 'scrapy_code.pipelines.JsonExporterPipleline': 300,
# 'scrapy_code.pipelines.MysqlTwistedPipline': 300,
'scrapy_code.pipelines.ElasticsearchPipeline': 1
}